Landscape photography is an art form that captures the grandeur of nature. From sweeping mountain vistas to serene seascapes, it’s about telling a story of the world around us. While the beauty of landscapes might seem effortless to capture, creating breathtaking images involves mastering technical skills, understanding light, and developing an eye for composition.
This guide dives deep into the techniques, tools, and tips you need to master landscape photography. Whether you're a beginner or a seasoned photographer, this journey will inspire you to elevate your craft.
Contents
- Why Landscape Photography Matters
- Step 1: Essential Gear for Landscape Photography
- Step 2: Mastering Composition
- Step 3: Timing is Everything
- Step 4: Techniques for Capturing Breathtaking Landscapes
- Step 5: Understanding and Using Light
- Step 6: Post-Processing Tips
- Famous Locations for Landscape Photography
- Challenges in Landscape Photography and How to Overcome Them
- Your Journey Beyond the Horizon
Why Landscape Photography Matters
Landscape photography holds a unique place in visual storytelling. It captures the planet’s beauty, educates audiences about remote or endangered locations, and often motivates conservation efforts.
Did you know? Some of the earliest known landscape photographs, taken in the 1850s by Carleton E. Watkins, played a significant role in the creation of Yosemite National Park in 1890.
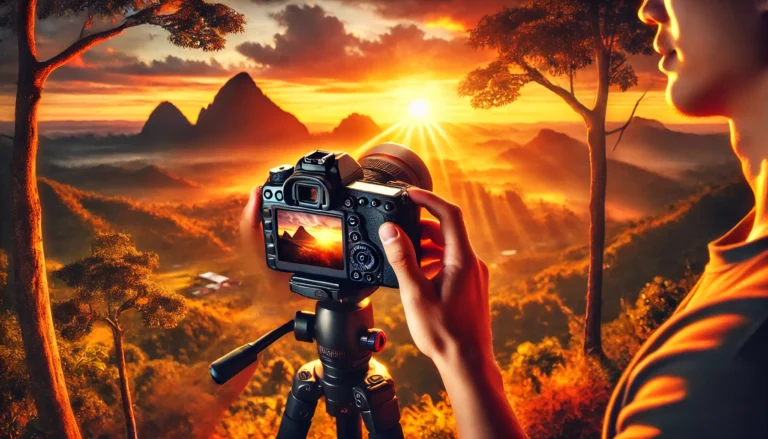
Step 1: Essential Gear for Landscape Photography
Investing in the right equipment can significantly enhance your landscape photography.
1. Camera
- DSLRs and Mirrorless Cameras: Offer excellent image quality and manual controls.
- Smartphones: Modern smartphones like the iPhone 15 Pro Max or Google Pixel 8 boast advanced features like RAW capture and computational photography.
2. Lenses
- Wide-Angle Lenses (14-35mm): Perfect for capturing expansive views.
- Telephoto Lenses (70-200mm): Ideal for isolating details in vast landscapes.
3. Tripod
A sturdy tripod is essential for long-exposure shots and ensuring stability in low-light conditions.
4. Filters
- Polarizing Filters: Reduce glare and enhance skies.
- ND (Neutral Density) Filters: Allow for long exposures, creating dreamy effects like blurred waterfalls.
5. Accessories
- Remote Shutter Release: Prevents camera shake during long exposures.
- Rain Covers: Protect your gear in unpredictable weather.
Step 2: Mastering Composition
Composition is the backbone of compelling landscape photography. Here are some principles to follow:
1. The Rule of Thirds
Divide your frame into nine equal sections with two horizontal and two vertical lines. Place key elements, such as the horizon or a focal point, along these lines or at intersections.
2. Leading Lines
Use natural lines, like roads, rivers, or fences, to guide the viewer’s eye into the scene.
3. Foreground, Midground, and Background
Create depth by including elements at varying distances. For example, rocks in the foreground, a lake in the midground, and mountains in the background.
4. Framing
Use natural elements like tree branches or archways to frame your subject.
5. Symmetry and Reflections
Capture balanced compositions, especially when shooting reflections in lakes or rivers.
Step 3: Timing is Everything
Landscape photography heavily depends on light and weather conditions.
1. Golden Hour
The hour after sunrise and the hour before sunset offer soft, warm light that adds depth and texture to landscapes.
2. Blue Hour
The period just before sunrise and after sunset provides cool, even lighting, perfect for tranquil scenes.
3. Weather and Atmosphere
Don’t shy away from shooting in dynamic weather. Storm clouds, mist, and rainbows can add drama and mood to your photos.
4. Patience is Key
Sometimes, waiting hours—or even days—for the perfect light or weather condition is worth it.
Example: Photographer Ansel Adams often spent days scouting locations and waiting for the ideal conditions to capture his iconic black-and-white landscapes.
Step 4: Techniques for Capturing Breathtaking Landscapes
1. Long Exposure Photography
- Use an ND filter to achieve slow shutter speeds, creating smooth water or motion-blurred clouds.
- Shutter Speed Tip: Start with 5–10 seconds for waterfalls and adjust as needed.
2. Focus Stacking
- Take multiple shots with different focus points (foreground, midground, background) and blend them in post-processing for maximum sharpness.
3. HDR (High Dynamic Range)
- Capture multiple exposures of the same scene and merge them to retain detail in both shadows and highlights.
4. Panoramic Shots
- Use your camera’s panorama mode or stitch multiple images together in editing software to capture wide vistas.
Step 5: Understanding and Using Light
1. Direction of Light
- Front Light: Illuminates the scene evenly, reducing shadows.
- Side Light: Enhances texture and depth by creating shadows.
- Backlight: Creates silhouettes and adds drama.
2. Light Quality
- Soft light (overcast conditions) reduces harsh shadows, ideal for forest and waterfall shots.
- Harsh light (midday sun) can work well with dramatic skies or desert scenes.
Step 6: Post-Processing Tips
Post-processing is where your vision truly comes to life.
1. Start with RAW Files
RAW files retain all the data captured by your camera sensor, allowing for greater flexibility in editing.
2. Software
Adobe Lightroom and Photoshop are industry standards, but free options like Darktable and GIMP are excellent alternatives.
3. Key Adjustments
- Exposure: Correct underexposed or overexposed areas.
- Contrast: Add depth by enhancing differences between light and dark areas.
- Colour Grading: Subtly enhance hues to reflect the scene’s mood.
- Sharpening: Bring out fine details in rocks, leaves, and textures.
Famous Locations for Landscape Photography
Need inspiration? Here are some iconic locations renowned for their breathtaking landscapes:
| Location | Country | Highlights |
|---|---|---|
| Yosemite National Park | USA | Dramatic cliffs and waterfalls. |
| Torres del Paine | Chile | Rugged peaks and turquoise lakes. |
| Banff National Park | Canada | Majestic mountains and emerald lakes. |
| Great Ocean Road | Australia | Stunning coastal scenery. |
| Mount Fuji | Japan | Iconic volcanic peak. |
Challenges in Landscape Photography and How to Overcome Them
1. Harsh Lighting Conditions
- Solution: Use ND filters or wait for better light.
2. Remote Locations
- Solution: Plan logistics in advance and carry essentials like water, snacks, and maps.
3. Camera Shake in Windy Areas
- Solution: Use a sturdy tripod, weigh it down, or shoot handheld with image stabilization.
Your Journey Beyond the Horizon
Mastering landscape photography is a blend of patience, practice, and passion. As you experiment with compositions, lighting, and techniques, you’ll develop your unique style that resonates with viewers.
Nature offers endless inspiration—whether it's the rugged peaks of the Himalayas or the tranquil beauty of a sunset over a quiet lake. Grab your camera, head out, and let the world unfold its magic before your lens.
What’s your favourite tip or location for landscape photography? Share in the comments below and let’s inspire each other! 😊